Keeping your injection molding machines in top shape requires a mix of regular care, proper planning, and preventive action. Good maintenance ensure you produce high-quality parts consistently.
Regular maintenance of your injection molding machines directly affects your bottom line.
When you maintain your machines properly, you prevent unexpected breakdowns that can halt production. These disruptions cost money in lost production time and rush orders to meet deadlines.
Safety is another key benefit. Clean, well-maintained machines are safer for your operators. Moving parts, electrical connections, and hydraulic systems all need regular checks to prevent accidents.
Types of Maintenance
Preventive Maintenance involves regular, scheduled tasks that help you avoid problems before they happen. This includes cleaning, lubricating, and inspecting machine components according to a checklist.
Corrective Maintenance addresses issues after they occur. While sometimes necessary, relying too heavily on this approach can lead to costly downtime and emergency repairs.
Predictive Maintenance uses monitoring technology to track machine performance and predict potential failures. Sensors can detect unusual vibrations, temperature changes, or pressure fluctuations that might signal trouble ahead.
Proactive Maintenance focuses on identifying and addressing the root causes of recurring issues. Rather than just fixing the same problem repeatedly, you look for ways to prevent it from happening again.
How to Schedule The Maintenance Tasks
Daily checks that operators can perform before starting production:
- Visual inspection of safety features
- Checking oil and fluid levels
- Looking for leaks or unusual noises
Weekly tasks that might include:
- More thorough cleaning of mold surfaces
- Checking electrical connections
- Inspecting hoses and fittings
Monthly and quarterly maintenance covering:
- Lubricating moving parts
- Calibrating sensors and controls
- Checking hydraulic and pneumatic systems
Document all maintenance activities in a log. This helps you track patterns and identify components that may need more frequent attention or replacement.
Routine Maintenance Procedures
Daily Checks and Cleaning
Start each day by inspecting your machine’s safety features. Check that emergency stops, safety gates, and light curtains are working properly.
Examine mold cavities for any plastic buildup or debris. A quick visual check can prevent part defects and damage to your mold. Use a soft brush or cloth to clean visible residue.
Check hydraulic oil levels and look for any leaks around cylinders, hoses, and connections. Low oil or leaks can cause erratic machine behavior and potentially damage components.
Clean the area around the machine, removing any scrap parts, material spills, or packaging. A clean workspace prevents contamination and makes it easier to spot issues.
Weekly Tasks
Lubricate moving parts according to your machine’s manual. Focus on tie bars, toggle mechanisms, and ejector pins. Proper lubrication reduces wear and extends component life.
Check the screw and barrel for wear signs. Listen for unusual noises during operation that might indicate damage. A worn screw can cause inconsistent material flow and part quality issues.
Inspect all water and cooling lines for leaks or blockages. Clean mold cooling channels to ensure proper temperature control.
Test the machine’s pressure and temperature controls to ensure they’re reading accurately. Recalibrate if needed to maintain part quality.
Monthly Inspections
Replace or clean oil filters to keep hydraulic systems running smoothly. Dirty filters restrict flow and can cause pressure fluctuations that affect your parts.
Take oil samples to check for contamination. If the oil looks cloudy or has particles, it might need changing sooner than scheduled.
Inspect electrical connections and controllers for loose wires or signs of heat damage. Tighten any loose connections to prevent electrical problems.
Check mold alignment and clamping system components for wear. Adjust as needed to prevent flash on parts or damage to the mold. A properly aligned mold produces better parts with less wear.
Inspect barrel heater bands and thermocouples for proper function. Temperature control is crucial for consistent material flow and part quality.
Lubrication and Hydraulic System Care
Lubrication Schedules
Your injection molding machine has many moving parts that need regular lubrication. Check the manufacturer’s manual for specific lubrication points and recommended intervals.
Daily checks should include looking for any signs of insufficient lubrication like unusual noises or overheating components. Keep a lubrication log to track when you last serviced each point.
For slide ways and guides, apply lubricant every 8 hours of operation. Bearings typically need attention weekly, while gear systems might require monthly service.
Use only the lubricants specified by your machine manufacturer. Using incorrect products can cause damage or premature wear to components.
Hydraulic Oil Management
The heart of your injection molding machine is its hydraulic system. Proper oil management ensures reliable operation and extends equipment life.
Check hydraulic oil levels daily before starting the machine. The oil should be between the minimum and maximum indicators on the sight glass.
Replace hydraulic oil according to your machine’s maintenance schedule—typically every 4,000-8,000 operating hours or annually, whichever comes first.
Monitor oil temperature during operation. Overheating (above 140°F/60°C) can degrade oil quality and damage seals.
Analyze your hydraulic oil every 3-6 months to check for:
- Water contamination
- Metal particles
- Acid content
- Viscosity changes
Hydraulic Component Inspection
Examine all hydraulic hoses for signs of wear, cracking, or leaking. Replace any damaged hoses immediately to prevent sudden failures or safety hazards.
Check pump performance by monitoring pressure readings during operation. Fluctuating pressure often indicates pump problems that need attention.
Inspect hydraulic cylinders for smooth operation and signs of leakage around seals. Wipe cylinders clean to make leaks more visible.
Test valves for proper function—they should open and close completely without sticking. Listen for unusual noises that might indicate valve problems.
Electrical System and Heater Bands Maintenance
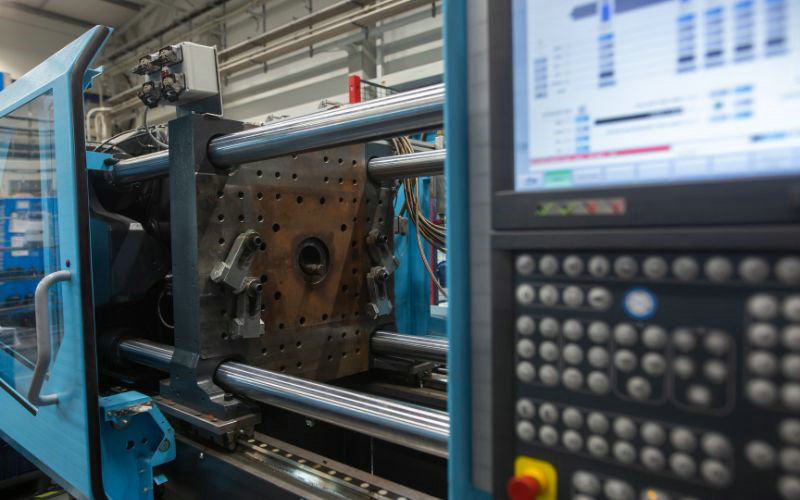
Electrical Component Check
Start by inspecting all wire connections in your electrical box at least monthly. Look for loose terminals, damaged insulation, or signs of overheating like discoloration. These issues can cause unexpected shutdowns or even fires.
Check control panels for proper function and clean them with compressed air to remove dust. Dust buildup can cause overheating and component failure.
Test safety switches and emergency stops regularly. These protect you and your team from accidents. If any switch feels sticky or doesn’t respond immediately, replace it.
Verify that temperature controllers are accurate using an external thermometer. Inaccurate readings can lead to poor part quality or machine damage.
Heater Bands Servicing
Clean heater bands monthly to remove plastic residue, oils, and dust. These contaminants reduce heat transfer efficiency and can cause uneven heating.
Check that bands are properly tightened against the barrel. Loose bands won’t transfer heat effectively, leading to inconsistent material melting and poor parts.
Inspect for signs of damage like:
- Burn marks
- Bulging
- Cracks in the insulation
- Corrosion
Measure resistance values with a multimeter when the machine is powered down and cooled. Compare these readings to manufacturer specifications to identify failing bands before they stop working completely.
Replace heater bands in sets when possible. This ensures even heating and prevents stress on your electrical system from bands with different power requirements.
Troubleshooting Electrical Issues
When temperature fluctuations occur, first check for loose heater band connections. Often, this simple fix can solve heating inconsistencies.
For persistent temperature control problems, test your thermocouples. Faulty thermocouples send incorrect signals to controllers, causing heating issues. Replace them if readings are inconsistent.
Use thermal imaging during operation to identify hot spots or cold zones. This technology helps you spot problems before they cause production issues or damage.
If circuit breakers trip frequently, don’t just reset them. Investigate the root cause – it could be overloaded circuits, short circuits, or failing components.
Keep a small inventory of critical electrical parts like fuses, contactors, and common heater band sizes. This reduces downtime when replacements are needed.
Monitoring and Improving Machine Performance
Performance Metrics
To properly manage your injection molding machines, you need to track the right numbers. Start by monitoring cycle times—how long it takes to complete one full molding cycle. Shorter, consistent cycles usually mean your machine is running well.
Watch your scrap rate too. High scrap means wasted materials and time. Aim to keep this below 3% for efficient operations.
Energy consumption is another important metric. Modern injection molding machines should use energy efficiently. Track kilowatt-hours per production run and look for unusual spikes that might indicate problems.
Machine availability percentage tells you how much time your equipment is actually producing parts versus sitting idle or being repaired. Try to maintain at least 85% availability for good productivity.
Quality Control Procedures
Set up a schedule to check dimensions, weight, and appearance of molded parts throughout production runs.
Visual inspection checklist:
- Check for flash or excess material
- Look for short shots (incomplete fills)
- Inspect for discoloration or burn marks
- Examine for warping or dimensional issues
Consider investing in automated inspection systems with cameras that can spot defects human eyes might miss. These systems can check every part without slowing production.
Material testing is also important. Periodically test the raw material to ensure it meets specifications before it goes into your machine. This prevents many quality issues before they start.
Safety Protocols and Best Practices
Working with injection molding machines requires careful attention to safety. You need to follow proper protocols to protect yourself and extend the life of your equipment.
Always wear appropriate personal protective equipment (PPE) when operating or maintaining machines. This includes safety glasses, heat-resistant gloves, and steel-toed boots.
Never bypass safety guards or interlocks. These features exist to prevent accidents and should remain in working order at all times.
Key Safety Measures:
- Lock out/tag out procedures before maintenance
- Regular safety audits and inspections
- Proper training for all operators
- Clear emergency procedures
Your maintenance schedule should include regular safety checks. Look for worn electrical connections, hydraulic leaks, or damaged guards that could cause injuries.
Keep the area around your injection molding machines clean and free of obstacles. This prevents trips and falls while allowing easy access during emergency situations.
Implementing a buddy system for maintenance tasks can provide extra safety. Having someone nearby can be crucial if something goes wrong.
Remember to document all safety incidents and near-misses. This information helps identify patterns and prevent future problems.
Regular training refreshers keep safety protocols fresh in everyone’s mind. Schedule these sessions quarterly to maintain awareness and compliance.
Frequently Asked Questions
What are the steps for routine preventive maintenance on an injection molding machine?
Start by checking all safety features including emergency stops and guards. Make sure they work properly before any maintenance begins.
Clean the machine surfaces, removing any material buildup or residue. Pay special attention to the mold area, barrel, and hopper.
Inspect hydraulic systems for leaks and check fluid levels. Top up if necessary, and replace filters according to the manufacturer’s schedule.
Examine all electrical connections for signs of wear, loose wires, or damage. Tighten connections as needed.
Test the heating elements and temperature controllers to ensure they maintain accurate temperatures. This affects product quality directly.
How often should preventive maintenance be performed on injection molding equipment?
Daily checks should include visual inspections, cleaning of mold surfaces, and monitoring of oil levels and pressures. These take just minutes but prevent many problems.
Weekly maintenance should involve more thorough cleaning, lubrication of moving parts, and checking for any unusual noises or vibrations.
Monthly tasks should include detailed inspections of hydraulic systems, electrical components, and calibration checks of pressure and temperature controls.
Annual maintenance often requires shutting down the machine for complete disassembly, cleaning, and replacement of worn parts. Schedule this during planned production downtime.
What are the common lubrication requirements for injection molding machines?
Hydraulic oil needs regular checking and replacement, typically every 2,000-4,000 operating hours. Always use the oil type specified by your machine manufacturer.
Grease points on moving components like toggles and tie bars require lubrication weekly. Use high-quality grease rated for the temperatures your machine experiences.
Guide pins and bushings need light lubrication to prevent binding and ensure smooth operation. Apply lubricant after cleaning these areas.
Chains and gears should receive proper lubrication according to the manufacturer’s schedule. Improper lubrication leads to premature wear and failure.
What are some cost-effective strategies for maintaining an injection molding machine?
Train operators to perform basic daily maintenance tasks. This prevents small issues from becoming big problems and reduces the need for specialized technicians.
Keep a maintenance log that tracks all services performed. This helps identify recurring issues and plan for preventive measures.
Stock essential spare parts like seals, filters, and heater bands. Having these on hand reduces downtime when replacements are needed.
Implement a condition-based maintenance approach by monitoring key parameters. This helps you address issues before they cause failures.
Clean and store molds properly when not in use. This extends their life and ensures quality parts when they’re needed again.
What items should be included in a comprehensive injection molding machine maintenance checklist?
Safety systems check, including emergency stops, guards, and interlocks. These should never be bypassed or ignored.
Hydraulic system inspection for leaks, fluid levels, pressure readings, and filter conditions. Document readings to track changes over time.
Electrical system review including controls, wiring, heaters, and thermocouples. Look for signs of overheating or damage.
Mechanical components check covering tie bars, toggle mechanisms, and moving platens. Watch for excessive wear or misalignment.
Lubrication points verification to ensure all areas receive proper lubrication. Create a map of points if one isn’t provided.
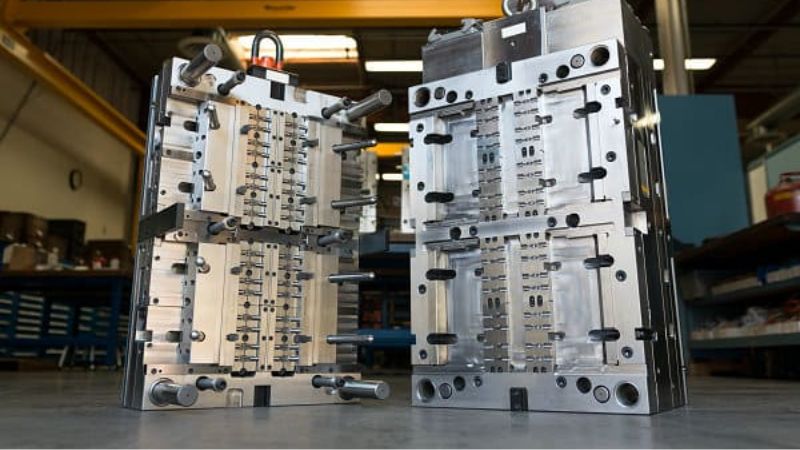
Mold inspection for damage, wear, and proper operation of ejector pins and cooling channels. Clean thoroughly before storage.
How can you effectively clean and maintain the molds used in injection molding machines?
Clean molds after each production run using appropriate cleaning agents. Different plastics require different cleaners, so check manufacturer recommendations.
Use soft brushes and non-abrasive tools to remove residue. Wire brushes can damage precision surfaces and should be avoided.
Inspect water cooling channels regularly for mineral buildup or blockages. Flush with the recommended solutions when deposits are found.
Apply rust preventative to steel molds when storing them. This prevents oxidation that can damage precision surfaces.
Store molds in climate-controlled areas to prevent moisture damage. Use dehumidifiers if necessary to maintain proper conditions.


