
Flash is a common defect in plastic manufacturing that can significantly impact production efficiency. As molten plastic is injected into a mold cavity to form parts, excess plastic often leaks out of the edges. This excess plastic, called flash, forms thin unwanted pieces around the molded component. If left unchecked, flash builds up over multiple production cycles, clogging mold vents and causing defects in the final products. Implementing optimized gate locations, runner systems, and injection parameters can minimize flash. This helps manufacturers improve quality and reduce waste.
This article will unveil the mystery of the cause of flash and how to prevent the situation when starting molding.
Key Takeaways:
- Flash is excess plastic leaking from the mold during injection molding, forming thin flaps on parts.
- Usually, flash occurs in parting line gaps, poor venting, low clamp force, low viscosity, overpacking, and high injection pressure.
- Flash causes additional processing, waste, mold damage and part defects, hurting efficiency.
- Solutions involve optimizing gate location, runners, process settings and using flash-free molds.
- Preventing flash requires proper mold design, support, clamp force, process settings, and quality control.
- The standard is to limit flash thickness to under 0.1mm, needing tight process control and refinement.
Introduction to Injection Molding Flash
When you’re venturing into the world of plastic injection molding, understanding the various defects that can occur during the production process is crucial. One common issue that you might encounter is known as flash injection molding. Flash is essentially excess plastic that seeps out of the mold cavity, forming unwanted thin pieces around the edges of your molded part.
You may wonder why this occurs. Well, flash can be attributed to various causes, and it’s often a telltale sign of a problem within the molding process or the mold design. Some of the main culprits include:
- Improper Clamp Force: Insufficient pressure to seal the mold halves may create gaps, allowing the plastic to escape.
- Mold Wear or Damage: Over time, a mold may suffer from wear or damage, which can lead to misalignment and flash.
- Excessive Injection Speed or Pressure: Too much speed or high pressure can force plastic out through the parting lines.
While dealing with flash in your plastic parts might seem daunting, it’s important for maintaining a streamlined production and ensuring design for manufacturability. After all, you want your final product to look sleek and function flawlessly. Flash not only impacts the aesthetic quality but also the fit and assembly of the finished products.
Understanding and addressing the causes of flash are key steps in optimizing your injection molding process. This not only saves you time but also reduces material waste and helps maintain product quality—crucial elements for any successful production operation.
Design and Tooling Considerations
When designing for injection molding, paying close attention to mold design, material flow, and overall design for manufacturability is essential to prevent defects such as flash.
Mold Design and Parting Lines
Your mold design is critical, as imperfections at the parting line can lead to flash. Ensure the mold halves align precisely to minimize any gaps or mismatches. You’ll want to focus on:
- Tight Tolerances: A high degree of accuracy will prevent resin from oozing out of the mold.
- Smooth Surfaces: Surfaces at the parting line should be smooth to allow the mold to close cleanly.
Material Flow and Viscosity
Controlling the flow and viscosity of your molding material is pivotal. A few points to keep in mind:
- Material Properties: Each material has a specific viscosity that affects flow; choose one that suits your tool design.
- Flow Analysis: A computational flow analysis can predict how material fills the mold, helping prevent potential flash.
Design for Manufacturability (DFM)
Designing parts with manufacturability in mind is essential for a flash-free molding process. Focus on:
- Draft Angles: Proper angles facilitate easier removal from the mold and reduce the risk of flash.
- Gate Location: This impacts everything from aesthetics to the structural integrity of the part. Proper placement is crucial.
Injection Molding Process Parameters
In injection molding, precise control over process parameters is essential to the quality of your final product. Temperature, pressure, and the injection rate are the pillars that define the moldability, strength, and appearance of the item you are creating.
Temperature Control
Managing the temperature is vital, as it affects the material’s viscosity and flow into the mold. The barrel and nozzle temperatures need to be accurately set within the specified temperature range for the material you are using.
- Barrel Temperature: This is usually set in a range that ensures the material is molten and flows easily, without degrading.
- Nozzle Temperature: Slightly lower than the barrel’s to prevent premature solidification that could lead to defects.
Injection Pressure and Clamping Force
The injection pressure helps push the molten material into all parts of the mold. It needs to be high enough to fill the mold completely but balanced to avoid excess:
- Clamping Pressure: This must be sufficient to keep the mold closed against the force of the injected material, preventing flash.
| Parameter | Purpose |
|---|---|
| Injection Pressure | Forces material into the mold. |
| Clamping Pressure | Holds the mold halves together during injection. |
Below are the specific roles of each type of pressure:
- Injection Pressure: Ensures complete cavity filling and structural integrity.
- Clamping Pressure: Counters the outward force to avoid mold separation and defects.
Injection Rate and Holding Process
The speed at which the material is injected — the injection rate — affects the consistency and quality of the product. A proper rate ensures smooth filling of the mold and reduces defects. After filling, the holding process applies pressure to compensate for material shrinkage as it cools, ensuring the end product maintains the correct dimensions.
| Phase | Impact |
|---|---|
| Injection Rate | Determines how quickly the mold cavity is filled. |
| Holding Process | Maintains pressure after injection to ensure quality. |
Understanding and controlling these parameters will significantly affect the efficiency of your injection molding process and the quality of the items you produce.
Causes and Prevention of Flash

When addressing the issue of flash in injection molding, understanding the causes is crucial for effective prevention. Here’s how you can maintain the integrity of your molded parts by focusing on key areas of concern.
Identifying Common Causes
Environmental Contaminants: Dust and debris can prevent the mold from fully closing at the parting line, allowing molten plastic to escape.
Mold Issues:
- Parting Line Mismatches: This happens when the two halves of the mold don’t align perfectly.
- Worn Mold Components: Over time mold components can wear down, providing opportunities for flash to occur.
Imperfections in the mold and the misalignment of the parting line are primary contributors to flash formation. Regular maintenance and careful handling of the mold components are vital to preventing these issues.
Effective Venting and Sealing Strategies
Vent Placement and Size:
- Position vents at the end of flow paths to aid in air escape.
- Ensure vents are properly sized; too small and they’re ineffective, too large and they allow plastic to escape.
Sealing Components:
- Inspect O-rings and seals regularly for wear and damage.
- Use the right materials that resist the temperatures and pressures involved in the process.
Proper venting and sealing are essential for controlling the flow of molten plastic. By allowing air to escape the mold cavity efficiently, you help prevent the buildup of pressure that can create flash.
Optimizing Clamping Pressure and Tonnage
- Clamping Pressure: Adjust the clamping force to ensure that the mold stays closed during the injection process.
- Clamp Tonnage: Higher tonnage can be applied to counteract the forces pushing the mold halves apart.
Adjust your clamping pressure and tonnage to suit the material and mold design you’re working with. Low clamping pressure can be a cause of flash, as the mold sections may not be held together sufficiently against the force of the incoming material. It’s critical that you find a balance — too much pressure can damage the mold, while too little can lead to defects.
Ways to Fix Flash in Injection Molding Process

Flash in injection molding is often a sign of an issue within the molding process, where excess material escapes the mold cavity, creating undesired flaps or protrusions. Here are effective strategies to mitigate this problem:
Design Modifications
Making design changes can be a significant step toward preventing flash. Consider optimizing your design for manufacturability (DFM) which ensures your product design can be seamlessly manufactured without defects like flash.
Mold Maintenance
A well-maintained mold is less likely to produce flash. Ensure that your molds are cleaned regularly and that any damage or wear is addressed promptly. A proper maintenance schedule can help extend the life of the mold and improve the quality of your molded parts.
Process Optimization
Adjust your injection molding process parameters such as temperature and injection speed to reduce the occurrence of flash. Low clamping pressure or incorrect setting of the processing parameters could lead to molten material seeping out of the mold.
Clamping Force
Increase the clamping force to ensure the mold halves are securely closed. This is critical because if the mold is not properly closed, plastic can seep out, causing flash.
Material Viscosity
Ensuring the correct viscosity of the material is essential. A lower viscosity increases the likelihood of the material flowing out of the mold, resulting in flash. You can control the viscosity through temperature settings and material selection.
Remember, diagnosing and fixing flash in your injection molding process can save costs and improve the quality of your final product. Consult experts and leverage comprehensive resources, such as the insights provided in “What Causes & How to Avoid Flash in Injection Molding Process,” to better understand and resolve flash-related issues.
Defects and Troubleshooting
In injection molding, addressing defects promptly ensures the longevity of your molds and the quality of your products. Let’s explore the common issues and their solutions.
Common Injection Molding Defects
Injection molding is susceptible to several defects that can affect surface finish and product quality. Flash, also known as mold flashing, is particularly problematic. It is the unwanted excess material that appears along the parting line or other areas of separation in the mold, often resulting in a thin fin of plastic on the finished product. Other frequent defects include:
- Warping: Distortion occurring due to uneven cooling.
- Sink Marks: Small craters or depressions due to insufficient cooling or filling.
- Short Shots: Incomplete parts due to insufficient material injection.
Identifying these defects early in the production process is crucial for maintaining the highest level of product quality.
Troubleshooting Flash
To troubleshoot flash, here are specific steps you can follow:
- Mold Inspection: Check for damage or debris that could prevent the mold from fully closing.
- Parting Line Integrity: Ensure that the parting line matches correctly without any misalignment.
- Mold Clamping Pressure: Adjust the clamping pressure; too low pressure allows flash to occur.
- Material and Process: Verify the material viscosity is appropriate, and optimize the injection pressure and speed.
In the case of contaminants, such as dust or dirt, a thorough cleaning of the mold might solve the problem. For flash removal, various techniques like manual trimming or chemical processes can be used, but prevention is always preferable. Remember, a consistent and vigilant approach to troubleshooting can save time and reduce the occurrence of defects significantly.
Post-Processing and Quality Control
After your injection molded parts emerge from the mold, they aren’t always customer-ready. You’ll likely need to perform post-processing to remove excess material and ensure parts meet quality standards. The following subsections provide insights into the techniques for deflashing and the measures for quality assurance.
Deflashing Techniques and Equipment
Deflashing is a critical step in post-processing to remove any unwanted flash from your injection molded parts. Here’s a concise look at some common methods:
- Manual Deflashing: You can use scissors or knives for simple deflashing tasks, making it a direct and affordable option. However, it requires precision and can be labor-intensive.
- Cryogenic Deflashing: This technique involves freezing the parts with liquid nitrogen to make the flash brittle, which then can be easily removed. It is effective for complex parts and polycarbonate materials.
The equipment you choose depends on the components’ geometry, material, and the degree of surface quality required.
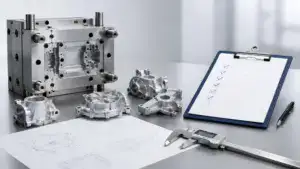
Quality Assurance for Injection Molded Parts
Quality assurance is vital to guarantee the functionality and aesthetics of your parts:
- Visual Inspection: Conduct a thorough visual check for surface defects and imperfections.
- Dimensional Inspection: Use calipers and micrometers to ensure that your parts meet your dimensional specifications.
Remember, high-quality injection molded parts are free from defects like flash and exhibit consistent surface quality, which reflects well on your brand and helps avoid costly rework.
In conclusion, properly addressing molding issues process design delivers substantial benefits to efficiency and. Minimizing flash generation cuts down on trimming and plastic waste. It also prevents the buildup of molds, extending the time tooling downtime. Molds with minimal flash can run longer between maintenance cycles at high output. Combined with process tuning of injection speed and packing pressure, manufacturers gain a through costs per part produced. By taking a holistic approach to flash reduction, plastic product makers can streamline production throughout the entire component life cycle.


